What are the steps to create a new Plant Species in the Plant Database?
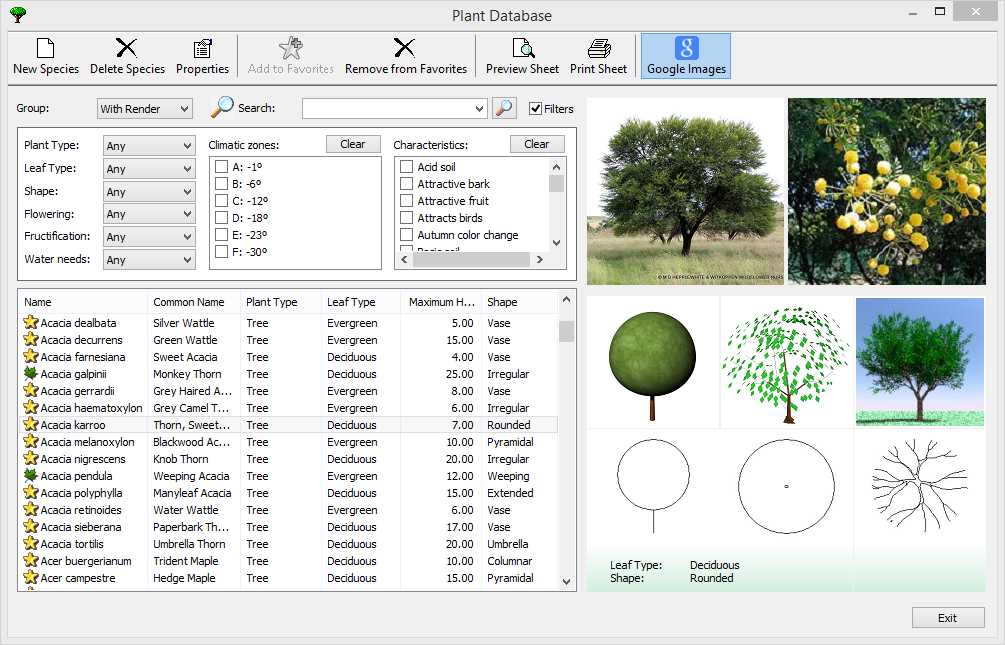
The Lands Design Plant Database contains more than 1800 species. You can extend this library by adding new species created by you.Add the new Plant Species in the Plant Database
-
Open the Plant Database _laPlantDatabase.
-
Add the new Plant Species from one of these two options in the toolbar line:
- New Species button: a New Plant species Properties dialog will appear.
- Duplicate Species button: a copy of the selected plant species will be created, taking all its details that you can edit afterwards. A floating dialog will ask you for the name of the duplicated plant species that will be added to the list. Select it and click on the Properties button to open its data sheet.
-
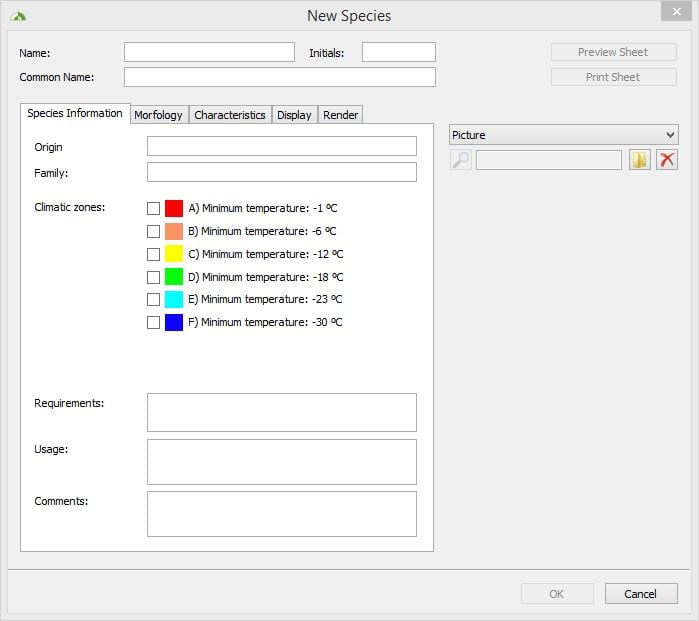
Fill the plant species data in the Properties dialog: add the plant species details from the Information, Morfology and Characteristics tabs.
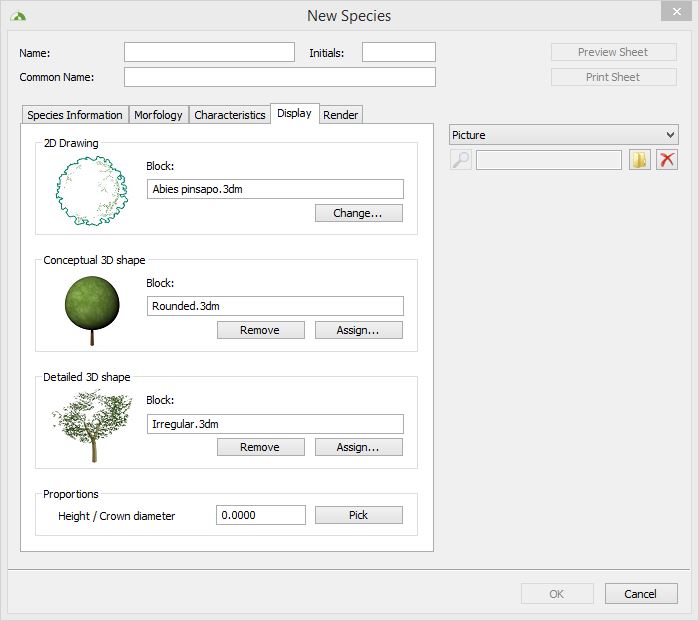
- Assign the 2D and 3D display representations: from the Display tab click on the Change buttons to assign the 2D Drawing, the 3D Conceptual shape and the 3D Detailed shape. There are several predefined block definitions for each representation type available in the block library. You can also create your own blocks and add them to the library. You just need to save them in your PC, and pick them up when you click on the Change button.
NoteWhen no specific 2D or 3D block is assigned to the plant 2D and 3D representations, Lands Design assigns a standard block for each representation type by default.
Assign a realistic representation to the plant species
You can assign the realistic representation of the plant species from the Render tab, in the New Species Properties dialog. This realistic representation uses a nXt Plant file (defined by “ArPlantX” file extension) that integrates the textures and appearance of the plant species to represent.
- Pick an existing Plant nXt file: click on the Change button to select any nXt plant file from the library.
- Modify an existing Plant nXt file:
- Click on the Change button to select any nXt plant file from the library
- Click on the Plant Editor button to open it with the Plant Editor.
- Modify the nXt file in the Plant Editor and save it as a new name. Close the Plant Editor.
- Click on the Change button again to assign the new nXt plant created.
- Create a new Plant nXt file:
- Open the Plant Editor from the Plant Editor button or from the Windows Start Menu > Lands Plant Editor.
- Create the nXt file in the Lands Plant Editor. Save it as in your PC or in the same folder where the other nXt files of the Lands library are located.
- Click on the Change button again to assign the new nXt plant created.
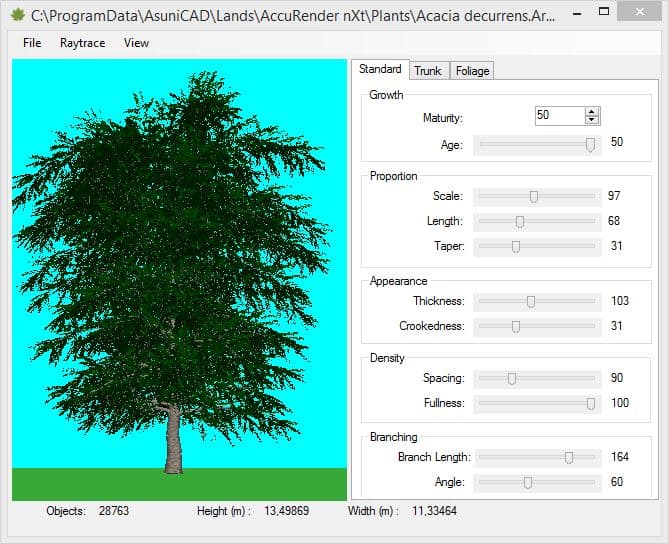 When working on the nXt plant in the Plant Editor, use the slider controls and tabs at the right side of the dialog to define the appearance of the plant species and the texture materials of its different parts (trunk, branches, leaves, flowers, etc).
From the Foliage tab you can create different foliage definitions assigned to different seasons, that you can use for season simulation when rendering the model where the plant species is inserted.
There are some templates available (File > New ) with different plant types to start the new file from.
The new plant species created will be stored in the Plant Database in your PC and will be available for new projects you work on with Lands Design.
When working on the nXt plant in the Plant Editor, use the slider controls and tabs at the right side of the dialog to define the appearance of the plant species and the texture materials of its different parts (trunk, branches, leaves, flowers, etc).
From the Foliage tab you can create different foliage definitions assigned to different seasons, that you can use for season simulation when rendering the model where the plant species is inserted.
There are some templates available (File > New ) with different plant types to start the new file from.
The new plant species created will be stored in the Plant Database in your PC and will be available for new projects you work on with Lands Design.